Coda Slider эффект. Часть 2

Важный момент — после прокрутки с помощью кнопок влево и вправо надо сделать активным соответствующий пункт верхнего меню. Для этого после завершения прокрутки надо вызвать функцию trigger() и передать ей в качестве аргумента ID кадра (панели). Например, если после прокрутки стала активной панель div#sites, функции trigger() будет передана строка ’sites’: функция найдет элемент навигации <a href=”#sites”>Sites</a> и сделает его активным.

// bind the navigation clicks to update the selected nav:
$('#slider .navigation').find('a').click(selectNav);

// handle nav selection - lots of nice chaining :-)
function selectNav() {
  $(this)
    .parents('ul:first') // find the first UL parent
      .find('a') // find all the A elements
        .removeClass('selected') // remove from all
      .end() // go back to all A elements
    .end() // go back to 'this' element
    .addClass('selected');
}

function trigger(data) {
  // within the .navigation element, find the A element
  // whose href ends with ID ($= is ends with)
  var el = $('#slider .navigation').find('a[href$="' + data.id + '"]').get(0);
 
  // we're passing the actual element, and not the jQuery instance.
  selectNav.call(el);
}

selectNav() выделена в отдельную функцию, потому что она нам потребуется еще раз - в момент щелчка по элементам верхнего меню.

Если URL запрашиваемой браузером страницы содержит якорь, например http://www.panic.com/coda/index.html#sites, надо сделать активным соответствующий пункт верхнего меню. Если URL не содержит якоря, активным будет первый пункт верхнего меню:

if (window.location.hash) {
  trigger({ id : window.location.hash.substr(1)});
} else {
  $('#slider .navigation a:first').click();
}

Далее, мы должны позаботиться о том, чтобы все ссылки на странице, имеющие якорь #sites, #files, #editor, #preview, #css и т.п. вызывали эффект прокрутки. В этом нам поможет плагин localScroll.

Теперь осталось только объединить все рассмотренные выше фрагменты кода в единое целое:

// when the DOM is ready...
$(document).ready(function () {

var $panels = $('#slider .scrollContainer > div');
var $container = $('#slider .scrollContainer');

// if false, we'll float all the panels left and fix the width
// of the container
var horizontal = true;

// float the panels left if we're going horizontal
if (horizontal) {
  $panels.css({
    'float' : 'left',
    'position' : 'relative' // IE fix to ensure overflow is hidden
  });
 
  // calculate a new width for the container (so it holds all panels)
  $container.css('width', $panels[0].offsetWidth * $panels.length);
}

// collect the scroll object, at the same time apply the hidden overflow
// to remove the default scrollbars that will appear
var $scroll = $('#slider .scroll').css('overflow', 'hidden');

// apply our left + right buttons
$scroll
  .before('<img class="scrollButtons left" src="images/scroll_left.png" />')
  .after('<img class="scrollButtons right" src="images/scroll_right.png" />');

// handle nav selection
function selectNav() {
  $(this)
    .parents('ul:first')
      .find('a')
        .removeClass('selected')
      .end()
    .end()
    .addClass('selected');
}

$('#slider .navigation').find('a').click(selectNav);

// go find the navigation link that has this target and select the nav
function trigger(data) {
  var el = $('#slider .navigation').find('a[href$="' + data.id + '"]').get(0);
  selectNav.call(el);
}

if (window.location.hash) {
  trigger({ id : window.location.hash.substr(1) });
} else {
  $('ul.navigation a:first').click();
}

// offset is used to move to *exactly* the right place, since I'm using
// padding on my example, I need to subtract the amount of padding to
// the offset.  Try removing this to get a good idea of the effect
var offset = parseInt((horizontal ?
  $container.css('paddingTop') :
  $container.css('paddingLeft'))
  || 0) * -1;


var scrollOptions = {
  target: $scroll, // the element that has the overflow
 
  // can be a selector which will be relative to the target
  items: $panels,
 
  navigation: '.navigation a',
 
  // selectors are NOT relative to document, i.e. make sure they're unique
  prev: 'img.left',
  next: 'img.right',
 
  // allow the scroll effect to run both directions
  axis: 'xy',
 
  onAfter: trigger, // our final callback
 
  offset: offset,
 
  // duration of the sliding effect
  duration: 500,
 
  // easing - can be used with the easing plugin:
  // http://gsgd.co.uk/sandbox/jquery/easing/
  easing: 'swing'
};

// apply serialScroll to the slider - we chose this plugin because it
// supports// the indexed next and previous scroll along with hooking
// in to our navigation.
$('#slider').serialScroll(scrollOptions);

// now apply localScroll to hook any other arbitrary links to trigger
// the effect
$.localScroll(scrollOptions);

// finally, if the URL has a hash, move the slider in to position,
// setting the duration to 1 because I don't want it to scroll in the
// very first page load.  We don't always need this, but it ensures
// the positioning is absolutely spot on when the pages loads.
scrollOptions.duration = 1;
$.localScroll.hash(scrollOptions);

});

Ссылки по теме:
Coda Slider эффект. Часть 1

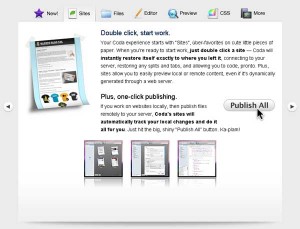
Прежде чем начать описание Coda Slider эффект, стоит посмотреть, что это вообще такое: вот один из примеров реализации. Повторить этот эффект у себя на сайте очень просто, если знать, какие плагины jQuery использовать:

HTML:

<div id="slider">
  <ul class="navigation">
    <li><a href="#sites">Sites</a></li>
    <li><a href="#files">Files</a></li>
    <li><a href="#editor">Editor</a></li>
    <li><a href="#preview">Preview</a></li>
    <li><a href="#css">CSS</a></li>
    <li><a href="#terminal">Terminal</a></li>
    <li><a href="#books">Books</a></li>
  </ul>

  <!-- element with overflow applied -->
  <div class="scroll">
    <!-- the element that will be scrolled during the effect -->
    <div class="scrollContainer">
      <!-- our individual panels -->
      <div class="panel" id="sites"> ... </div>
      <div class="panel" id="files"> ... </div>
      <div class="panel" id="editor"> ... </div>
      <div class="panel" id="preview"> ... </div>
      <div class="panel" id="css"> ... </div>
      <div class="panel" id="terminal"> ... </div>
      <div class="panel" id="books"> ... </div>
    </div>
  </div>
</div>

CSS:

#slider {
  width: 620px;
  margin: 0 auto;
  position: relative;
}

.scroll {
  height: 250px;
  overflow: auto;
  position: relative; /* fix for IE to respect overflow */
  clear: left;
  background: #FFFFFF url(images/content_pane-gradient.gif) repeat-x scroll left bottom;
}

.scrollContainer div.panel {
  padding: 20px;
  height: 210px;
  width: 580px; /* change to 560px if not using JS to remove rh.scroll */
}

Стиль для кнопок прокрутки влево и вправо:

.scrollButtons {
  position: absolute;
  top: 150px;
  cursor: pointer;
}

.scrollButtons.left {
  left: -20px;
}

.scrollButtons.right {
  right: -20px;
}

Подключаем библиотеку jQuery и необходимые плагины;

<script src="jquery-1.2.6.min.js" type="text/javascript"></script>
<script src="jquery.scrollTo-1.3.3-min.js" type="text/javascript"></script>
<script src="jquery.localscroll-1.2.5-min.js" type="text/javascript"></script>
<script src="jquery.serialScroll-1.2.1-min.js" type="text/javascript"></script>

Создаем кнопки прокрутки влево и вправо:

var $scroll = $('#slider .scroll');
$scroll
  .before('<img class="scrollButtons left" src="images/scroll_left.png" />')
  .after('<img class="scrollButtons right" src="images/scroll_right.png" />');

Продолжение следует…

Создание превьюшек: PHP и плагин imgAreaSelect для jQuery

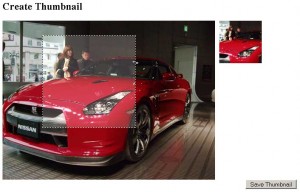
Плагин imgAreaSelect позволяет выделить область на большом изображении с помощью мышки. Координаты выделенной области отправляются на сервер и серверный скрипт создает превьюшку заданного размера (в нашем примере 100×100px). При этом размер выделенной области может быть любым - 200×200px, 300×300px, 50×50px и т.д.

1. Создаем форму для загрузки файла изображения на сервер:

<form name="photo" enctype="multipart/form-data" action="my_upload.php" method="post"> 
Photo: <input name="image" type="file"> 
<input name="upload" value="Upload" type="submit"> 
</form>

2. Переименовываем и изменяем размер загруженного изображения:

if (isset($_POST["upload"])) {
    //Get the file information
    $userfile_name = $_FILES["image"]["name"];
    $userfile_tmp = $_FILES["image"]["tmp_name"];
    $userfile_size = $_FILES["image"]["size"];
    $filename = basename($_FILES["image"]["name"]);
    $file_ext = substr($filename, strrpos($filename, ".") + 1);

    //Only process if the file is a JPG and below the allowed limit
    if((!emptyempty($_FILES["image"])) && ($_FILES["image"]["error"] == 0)) {
        if (($file_ext!="jpg") && ($userfile_size > $max_file)) {
            $error= "ONLY jpeg images under 1MB are accepted for upload";
        }
    }else{
        $error= "Select a jpeg image for upload";
    }
    //Everything is ok, so we can upload the image.
    if (strlen($error)==0){

        if (isset($_FILES["image"]["name"])){

            move_uploaded_file($userfile_tmp, $large_image_location);
            chmod ($large_image_location, 0777);

            $width = getWidth($large_image_location);
            $height = getHeight($large_image_location);
            //Scale the image if it is greater than the width set above
            if ($width > $max_width){
                $scale = $max_width/$width;
                $uploaded = resizeImage($large_image_location,$width,$height,$scale);
            }else{
                $scale = 1;
                $uploaded = resizeImage($large_image_location,$width,$height,$scale);
            }
            //Delete the thumbnail file so the user can create a new one
            if (file_exists($thumb_image_location)) {
                unlink($thumb_image_location);
            }
        }
        //Refresh the page to show the new uploaded image
        header("location:".$_SERVER["PHP_SELF"]);
        exit();
    }
}

3. Теперь можно использовать плагин imgAreaSelect для выделения области. Через скрытые поля формы на сервер передаются переменные:

  • x1, y1 - координаты левого верхнего угла выделеной области
  • x2, y2 - координаты правого нижнего угла выделеной области
  • width - ширина области выделения
  • height - высота области выделения

Плагин поддерживает множество параметров: мы выбрали соотношение сторон выделенной области 1:1 (поскольку превьюшка у нас 100×100px, т.е. соотношение сторон 1:1, то и выделенная область должна быть 1:1) и предварительный просмотр того, что получим в результате.

$(window).load(function () { 
    $("#thumbnail").imgAreaSelect({ aspectRatio: "1:1", onSelectChange: preview })
});

Функция prewiev() вызывается как только будет выделена область на большом изображении. Она создает окно предварительно просмотра - что будет получено в результате. Вторая часть функции записывает в скрытые поля формы координаты области выделения, которые позже будут отправлены на сервер.

function preview(img, selection) { 
    var scaleX = 100 / selection.width
    var scaleY = 100 / selection.height;   

    $("#thumbnail + div > img").css({ 
        width: Math.round(scaleX * 200) + "px"
        height: Math.round(scaleY * 300) + "px"
        marginLeft: "-" + Math.round(scaleX * selection.x1) + "px"
        marginTop: "-" + Math.round(scaleY * selection.y1) + "px" 
    })
    $("#x1").val(selection.x1)
    $("#y1").val(selection.y1)
    $("#x2").val(selection.x2)
    $("#y2").val(selection.y2)
    $("#w").val(selection.width)
    $("#h").val(selection.height)
}

Следующая функция перед отправкой формы проверяет, сущестувет ли область выделения - т.е. что пользователь выделил мышкой область для создания превьюшки.

$(document).ready(function () { 
    $("#save_thumb").click(function() { 
        var x1 = $("#x1").val()
        var y1 = $("#y1").val()
        var x2 = $("#x2").val()
        var y2 = $("#y2").val()
        var w = $("#w").val()
        var h = $("#h").val()
        if(x1=="" || y1=="" || x2=="" || y2=="" || w=="" || h==""){ 
            alert("You must make a selection first")
            return false
        }else{ 
            return true
        } 
    })
});

4. Наконец, серверный скрипт создает на основе переданных координат области выделения превьюшку:

if (isset($_POST["upload_thumbnail"])) { 
    //Get the new coordinates to crop the image. 
    $x1 = $_POST["x1"]
    $y1 = $_POST["y1"]
    $x2 = $_POST["x2"]; // not really required 
    $y2 = $_POST["y2"]; // not really required 
    $w = $_POST["w"]
    $h = $_POST["h"]
    //Scale the image to the 100px by 100px 
    $scale = 100/$w
    $cropped = resizeThumbnailImage($thumb_image_location, $large_image_location,$w,$h,$x1,$y1,$scale)
    //Reload the page again to view the thumbnail 
    header("location:".$_SERVER["PHP_SELF"])
    exit()
}